3D printed face shield
Table of contents
Introduction
The 3D printed face shield is an open source design created by Prusa Printers in conjunction with the Czech Ministry of Health. The link https://www.prusaprinters.org/prints/25857-prusa-face-shield gives more information about the design and provides the design and manufacturing files while this page here adds further details on how Fab Lab Ballyshannon made it.

Cleaning and sterilisation
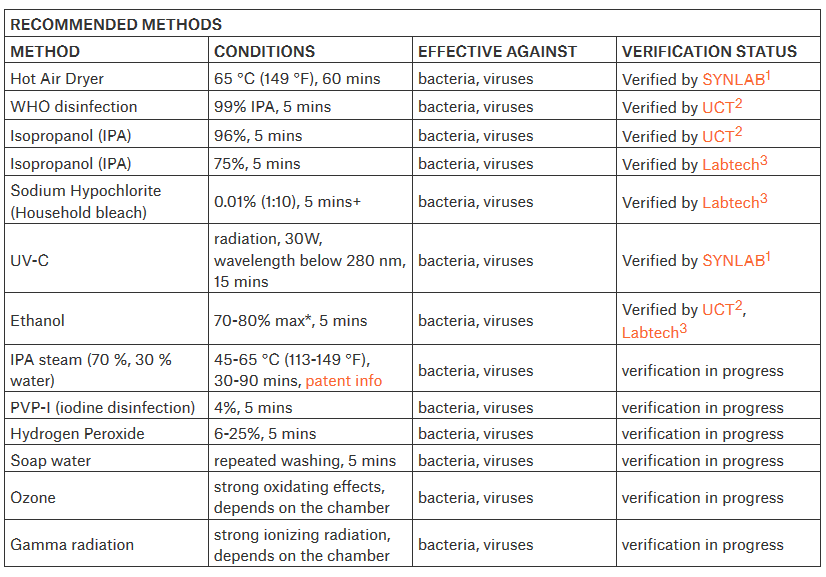
The face shields produced by Fab Lab Ballyshannon will be sterilised in a local hospital prior to use, however this does not remove the requirement that making and assembling the shields should take place in a hygienic and clean environment. This link CLEANING AND STERILISING FACE SHIELD is to the Prusa website which is regularly updated regarding the methods by which the face shields should be cleaned and sterilised. As a rule, any assembly should take place with the operator(s) wearing gloves, face mask and face shield to limit contamination of the parts. The part should be cleaned prior to assembly using any of the recommend methods. The table below is from the Prusa link listing the different methods and solution to sterilise the face shields but it is important to connect to the Prusa website on this issue as these recommended methods are regularly updated.
Design and manufacture
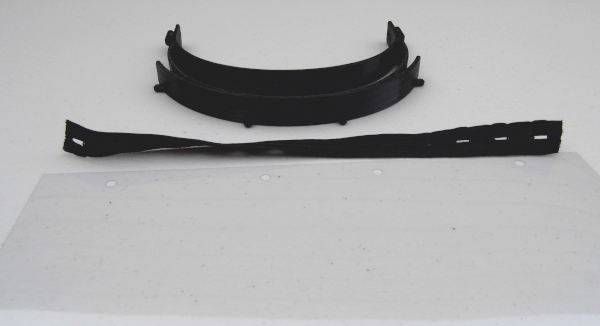
The face shield is made up of three parts:
- 3D printed headband
- Clear visor
- Elastic strap
3D printed headband
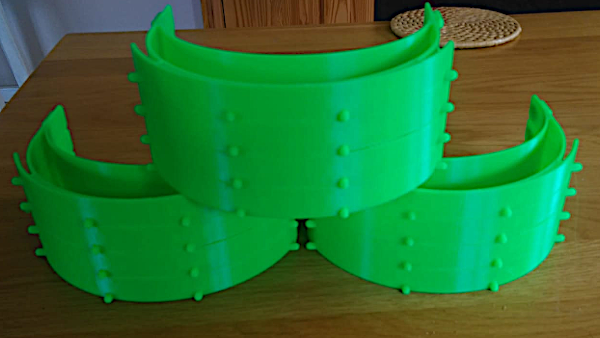
The latest revision of the headband design from Prusa is version RC3. Typically this can be printed as a single headband or a stack of 4. Using the Fab Lab's Prusa i3 MK3/S printer these were made as a stack of 4. Each stack takes 8 hours to print and uses 180g of filament. While Prusa recommend using PETG filament it is a case of what ever filament is at hand and both PETG and PLA have been used in the prints.
The Prusa design files are available as project files with recommended settings for use with Prusa printers so if using a different printer it is a good idea to investigate the slicer settings for the Prusa printer and modify or copy these to suit the different printer. The main things to watch out for are layer height at 0.25mm, 3 perimeters and 30% infill. Speed and other settings will vary depending on the printer.
The images below show a stack of Fab Lab printed parts alongside some images from Prusa showing single and stacked headbands.


Clear visor
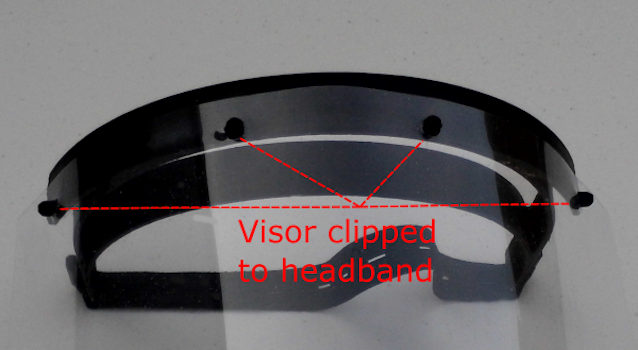
The visor can be made from various materials with Prusa recommending 0.5mm or 1mm thick clear PETG. There is a shortage of this material, so we decided to use 240 micron clear PVC binder covers. A standard hole punch is used to print two sets of holes in the binder cover and these clip on to the mounting lugs on the headband. It is important the holes are positioned properly, and the hole punch guide should be set up so that the first hole is approximately 38mm from the edge of the visor. If the holes are incorrectly placed the visor will not fit onto the headband or there will be a gap between the visor and the headband. See images below of how the visor is made and attached to the headband.
It helps to add a slight chamfer to the corners of the visor to remove any sharp edges.

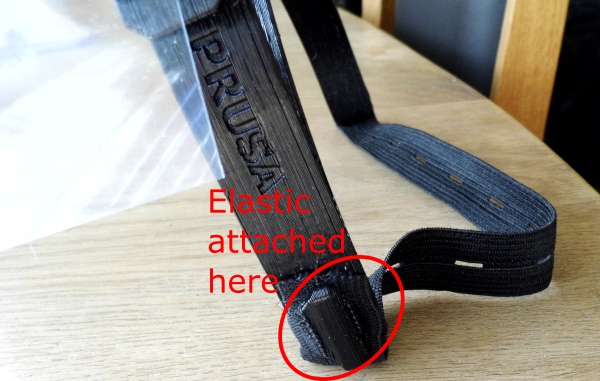
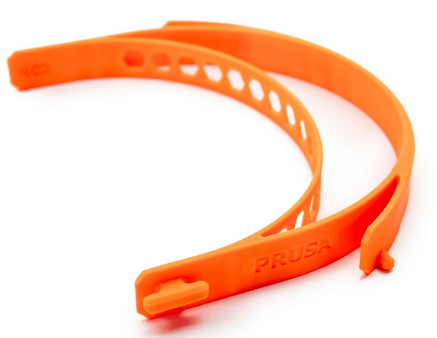
Elastic strap
The elastic strap is simply button hole elastic approximately 20mm wide and cut to 30cm in length. The button holes allow the strap to be easily fixed to the headband and adjusted for length.